Digital Image Editing Software
One of the great advantages of digital photography is the ease with which the resulting photos can be manipulated and improved later using your computer and an image editing program. Of course, you can also do this by scanning film prints or slides, but dealing directly with digital images is faster, easier, and virtually free.
Underwater photos ( film or digital ) may suffer from the following problems:
- lack of contrast
- lack of sharpness
- excessive darkness or light
- loss of red tones / poor color balance
- poor framing and composition
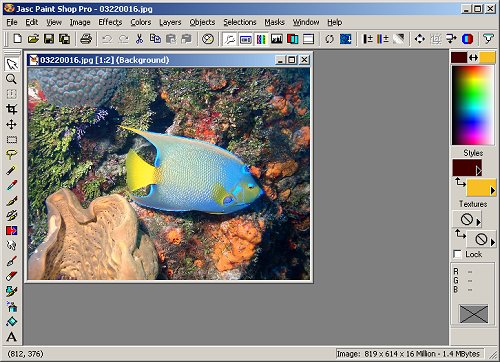
With a digital image, all of these are easily corrected, within reason. As I said above, it is often possible to turn a poor shot into a usable one, and a good shot into a great one, using image editing software. My favorite program ( for PC ) is an inexpensive but highly capable package called PaintShop Pro. You can download a fully functional trial version from https://jasc.com. This program is small, fast, and easy to use, unlike the clumsy, difficult, and slow heavyweights from Adobe and Corel. Windows XP even comes with a serviceable if limited image editing program for free.
Paintshop allows you to correct all of the problems listed above and many others. Color controls can directly adjust darkness, contrast, and color balance. There are filters to automatically sharpen, soften, and blur images, and tools to rotate, crop, and resize your images. In addition, Paintshop contains a host of digital painting tools. Almost all the images in this website, whether scanned or digital, were edited in Paintshop v7.
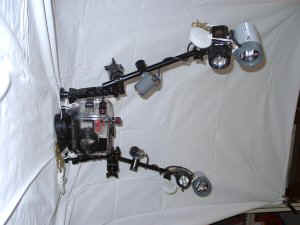
For example, for the Ikelite housing image above, I initially photographed the subject against a white bedsheet, rotated it, and then digitally erased the background. The image was then cropped to emphasize the subject and resized it to fit the page layout here. Finally, the text labels and logo were added, to get the final product.
 Before | 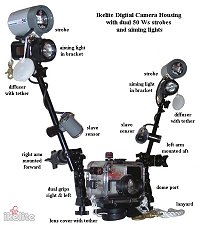 After |
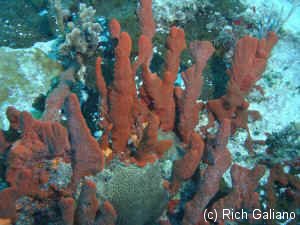
On the more typical underwater photograph below, notice how the bluish cast has been removed, and the vibrant reds and deep blacks restored. Although you couldn't possibly see it here in these tiny examples, often a one-click application of the sharpen filter will bring out a great deal of eye-pleasing detail, such as the scales on the side of a fish. All of these things are easy to learn how to do.
 Before | 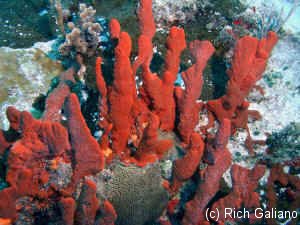 After |
An even more radical example of what is possible: here Samantha is lost against a bright sky. Selectively lightening areas of the picture brings out the figure in the foreground.
 Before |  After |
Probably the most common image manipulating sequence is Crop - Resize - Sharpen.
- Crop - to remove extraneous parts of the image and focus the viewer on the intended subject
- Resize - usually to make a smaller image, for use in a web page, or to send in email
- Sharpen - to restore lost detail ( or the appearance of it ) in images that have been shrunken
Almost all of the images in this website were manipulated in this way.
Another function that can be useful for underwater images is grayscale. Use this to turn an overly green image into a normal-looking black-and-white one when other color manipulations fail. Our eyes see black-and-white under low-light conditions, and this looks much more natural in a photo than shades of green.
Do you think this is cheating? How do you think the pros get those great pictures that you see in the dive magazines? In fact, they probably go to even greater lengths than I have described here. And you can do all this on your home computer.