Underwater Photography In General
Photography is all about light. Good lighting is the single most important factor in getting good pictures. After that, technique, experience, and artistic composition are second, and fancy expensive equipment is a distant third.
Unlike photo equipment, light is generally free, during the day anyway. For good results, you usually want to collect as much of it as possible for every picture. This is the job of your camera's lens. The lens is the most important part of a camera, and it is ironic how manufacturers of SLR systems with interchangeable lenses generally sell kits with fancy expensive bodies ( lots of buttons, etc ) and cheap lenses. Even more ironic, much low-end photography is done with disposable cameras that have no lens at all! Whether you use a point-and-shoot, a digital, or an SLR, make sure your camera has a good lens on it. Secondarily, shutter speed also affects your light-collecting ability. Better cameras have controllable shutters, while point-and-shoots are usually fixed at around 1/100 second.
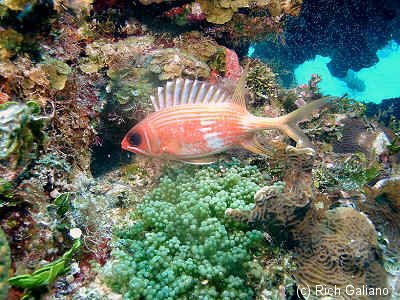
As I said, on land during the day there is usually plenty of nice bright white light from the sun. Underwater is a different story. Light is much more greatly attenuated by water than by air. Not only that, but different colors are lost at different rates, or depths, the thing that is important to us divers. With a bright sun burning overhead in the tropics, you can get pretty good natural color balance down to about 30 or 40 ft. Below that, everything starts to turn blue, as the red light is filtered out by the water above. Your eyes are capable of adjusting to different color balances so that scenes will appear normal to you, but your camera will see everything as it really is - blue. The deeper you go, the more color is lost, until eventually everything is more or less gray. This is aggravated when the sun is low in the sky, and less light penetrates the surface. Colors are also filtered out horizontally, which is why long shots always turn blue, even in shallow water.
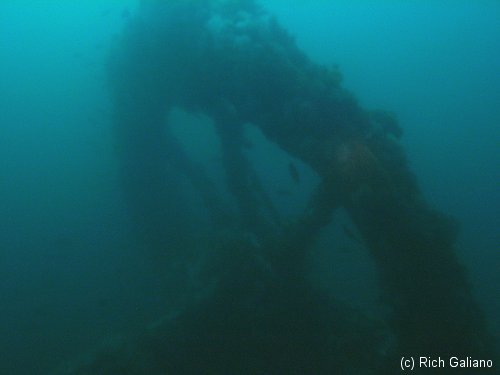
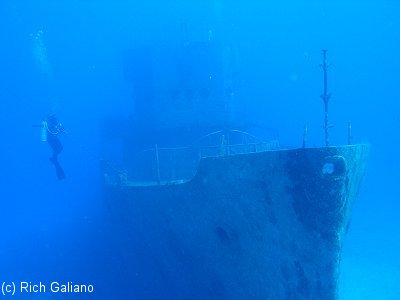
That's the situation in the bright sunny crystal-clear tropics. The situation is different around here. The waters of the North Atlantic are seldom clear, more often soupy green. Forget about colors, at offshore diving depths of 60 ft or more, often so little light penetrates that your camera is lucky to see anything at all. Obviously, this can be a major stumbling block to photography.
The solution is to bring your own light with you, in the form of a strobe or flash. As on land, these have a very limited range, and even less in the water. Flash photography underwater is limited in range to about 8 ft at the extreme, 4-6 ft commonly. Another problem with flash photography underwater is backscatter - the snowstorm effect caused by illuminated particles suspended in the water between the lens and the subject. Backscatter is minimized by moving the light source away from the lens, which is the reason why underwater strobes are mounted on long arms.
The other solution to the light problem is to simply gather as much ambient light as possible, using a wide aperture lens and longer shutter speed, as well as possibly faster film. Better cameras, both film and digital, will give you access to a world of ambient-light photography that is simply not possible with a budget camera having a fixed shutter and small aperture.

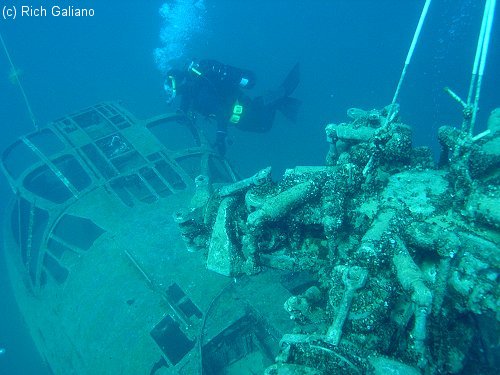
In either case, a wide-angle lens will be essential to capture larger subjects underwater. On land, to shoot a larger subject, you can simply back away from it. Underwater this is not effective, as the intervening water will affect both the colors and the clarity of the shot. You may get away with it on occasion in the tropics, but with the limited visibility of the North Atlantic, your subject will often disappear into the haze if you back away even a few yards! A dome port, wide-angle, or "water correcting" lens on the camera housing, as well as a good wide-angle lens on the camera itself, will allow you to capture larger subjects at ranges that will result in good photographs. A wide-angle lens will also correct for the refractive properties of water as compared to air, which reduces the field of view of a camera in the water.
The sad fact for North Atlantic photographers is that most of the time conditions are simply not good enough for any kind of photography. Bring your camera on every trip, so you don't miss that rare day that is extra clear. Given the early morning schedules of most area dive boats, I usually use the first dive of the day to scout the location, without the camera. If conditions are good, I take the camera on the second dive, when the sun is high and the light is best.
When attempting ambient light shots, try to get below the subject and shoot up at it, silhouetting against the bright water's surface. Shooting up or out from inside a dark hole can also yield nice results. To capture larger scenes, brace the camera against a solid object for very long shutter times. Manually firing a strobe during a long exposure can freeze foreground details, such as fish.
Digital Photography
- Get a large memory card for your digital camera, at least 1 GB, and always use the best image-save settings. Remember – digital pictures cost nothing, so take lots. Shoot each scene several times if possible. You can throw away bad shots later, but you can never go back and get missed ones.
- In conjunction with a large memory card, use the Delete button sparingly. Unless it is plainly evident that an image did not come out, keep it. It is difficult to judge the true quality of a shot until you see it full-size on your computer monitor, at which time you can delete it if it really is no good. Using image editing software on your computer it is often possible to turn a poor shot into a usable one, and a good shot into a great one.
- Start every dive ( or at least every day ) with an empty memory card ( or a fresh roll of film ) and a fresh set of batteries – you can’t change them underwater. A complication in local waters is that when batteries get cold, they stop working. A housed digital camera immersed in 44 degree water is going to cold-soak pretty quickly, and the combination of cold and normal power drain will prematurely sap the batteries, making the camera function more and more slowly until eventually it may stop entirely. Everything will recover when it warms up again, but that doesn’t do you any good, so start every cold-water dive with a fresh set of fully-charged batteries. Conserve power by minimizing use of playback mode during and between dives.
- Don’t use any of the camera’s built-in effects and filters, digital zoom, or the red lens filter that may have come with your camera housing. All of these special effects can be easily duplicated after the fact in your computer, at which time you have much greater control over what you do with an image, or don’t do. Try to capture your images in the most “raw” and natural format possible, using nothing but light and lens.
- While a fine optical zoom lens should be a part of any good digital camera, you generally don’t want to use it underwater. Just set it on full-wide and leave it. Instead of zooming, get as physically close as possible to your subject to get the best colors and definition. Optical zoom may be somewhat useful for macro shots; however, it may also throw off the camera’s auto-focus system. Always use whatever wide-angle lens or port is available for your housing.
- Try to maximize ambient light by shooting with a strong noontime sun overhead. On morning trips, leave the camera in the boat for the first dive, when the sun is low in the sky, and just go scouting. If conditions are good, take the camera on the second dive. On strongly overcast days, don’t bother.
- Kick up the camera’s ISO sensitivity one or two notches for better exposures. Never increase the sensitivity more than this, as this degrades the image excessively. Do not use increased sensitivity settings with artificial lighting at night.
- Use only the always-on and always-off flash settings on the camera; never use the auto-flash setting underwater, as the results will be unpredictable. Use the always-on setting for all shots within strobe range, and always-off for long shots where the strobe would be ineffective. If flash use is questionable, experiment – take the same shot both with and without flash by changing the setting on the camera. Don’t just turn the strobe away – that will give a certain underexposure.
- Work around shutter lag with a digital camera. Slow-moving and still subjects are easiest to shoot. As you get better, try tracking moving subjects manually as you wait-out the shutter lag. On my camera, the display actually blanks briefly when you trip the shutter. At this point, switch to looking through or over the housing. Using a fast shutter speed, good depth-of-field, and a wide-angle lens, with practice you can learn to manually track a moving target pretty well.
- Always be conscious of current camera settings – exposure, flash, macro/normal, etc, as well as strobe aiming. Keep the camera in whatever configuration is most likely to be useful, rather than just leaving it in whatever mode you used last. This way, when that really great shot comes along, you don’t blow it in the excitement of the moment by trying to shoot a Whale Shark in macro mode.
References on Underwater Photography

Most books on u/w photography deal strictly with the tropics. Many are fairly technical and go into a great deal of detail describing what is today essentially obsolete equipment, while others are little more than photo albums. I've yet to find a book on underwater photography that I would consider really useful, which is part of my motivation in writing these pages. For a great beginner's guide to photography in general ( but not underwater, ) pick up a copy of Michael Langford's 35mm Handbook.