Underwater Camera Housings & Lights
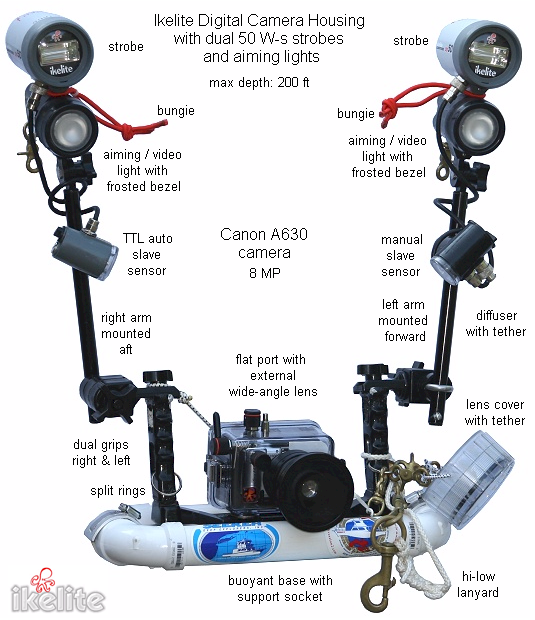
Pictured above is my own system, circa 2007. While the camera and housing have long since been retired and replaced, the rest of the setup has a much longer useful life, like the Ikelite external wide-angle lens, the Ikelite mounting frame with DIY float, dual Ikelite strobes, and spotting/video lights, and everything else that isn't the camera and housing.
Many manufacturers nowadays make underwater housings for their current cameras. Ikelite also makes camera housings for a lot of high-end models. The problem is, the housing is tied to the camera, and cameras change so fast. If the housing leaks and destroys the camera inside, you can throw both away.
Wide-angle Lens
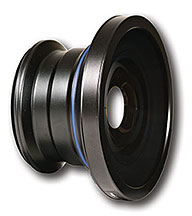
The wide-angle lens is also from Ikelite, it roughly doubles the field of view. The camera must actually be zoomed just a bit to avoid vignetting; I usually don't bother. The lens mounts solidly to the port, yet still clears bubbles with no difficulty. I tied a tether around the lens body and attached it to the handle, just in case.
The Ikelite lens is actually a rebranded Epoque and of good quality. An optical coating on the front glass quickly succumbed to saltwater, and was rubbed off with automotive buffing compound. On a lens like this, that was probably an anti-flare coating, and I don't see that being much of a problem underwater. The lens is also usable out of the water, where it behaves like a fisheye.
Handle & Base
The handle is from my old Ikelite housing; it is otherwise available as a separate item, either single or dual. Obviously, the dual handle like mine is needed for a dual strobe setup. I use the 3/8" threaded hardware, rather than the quick-release. I think it is stronger and more suited to local conditions, and in any case, I don't want anything that might come apart in the water.
I replaced the stock plastic base with a homemade PVC buoyancy collar that reduces the in-water weight to a manageable two or three pounds. Out of the water weight is almost 20 pounds. The collar has a socket mount on the bottom for a camera support, either a tripod or monopod. I actually have a tripod that was custom-made by a friend, but you could simply sacrifice a cheap tripod for underwater use. A simple PVC monopod is easier to use. My own design breaks down for easy carriage and even features a tilt and swivel head. The collar also allows the whole package to sit upright when out of the water.
A standard Jersey "hi-lo" lanyard is attached to the handle at the left side. This allows me to have the camera firmly attached to me at all times. In fact, I usually jump in with it rather than have it handed down. I do this with all my things and have not lost a piece of gear in years. If the camera will clearly be of no use, the lanyard can also be used to tie it down near the anchor line, so as not to have to lug it around.
Lighting
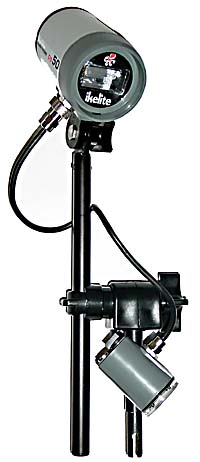
The lighting setup consists of two Ikelite DS-50 underwater strobes, inherited from my previous setup. These are small but powerful for their size and run on convenient AA batteries. A single one is really inadequate for local conditions, and even two do not fully cover the field of view of the wide-angle lens. Ikelite makes bigger strobes that would undoubtedly work better, but they are much more expensive. I seldom use the strobes underwater anyway, as they are limited in range to about eight feet, and I often want to shoot further.
The strobes are triggered by the camera's internal flash via slave sensors. One has an automatic TTL sensor, the other has a manual sensor; newer models actually have better electronics built-in. Both strobes also have a manual "full-blast" mode, which I find most useful in dark murky New Jersey conditions: make as much light as possible, and dial back the exposure in the camera if necessary.
In addition to the strobes, each arm also carries a regular light. These are Ikelite's Mini-C model, with accessory mounting brackets. The Mini-C throws a very bright pencil beam that is useful for aiming the attached strobe. To make them more useful for shooting video as well, I rough-sanded the bezels, giving them a more diffused even light. Each Mini-C also has a brass clip attached, should it ever be needed.
The Ikelite arms are simple and strong, and easy to adjust in the water. The plastic eyebolts that hold the arm assembly together were replaced with stainless steel after they broke. The only other modification to the arms was to add through-bolts to the ends to prevent the arms from slipping out of the eyebolts should they loosen. These are visible in the photo below.
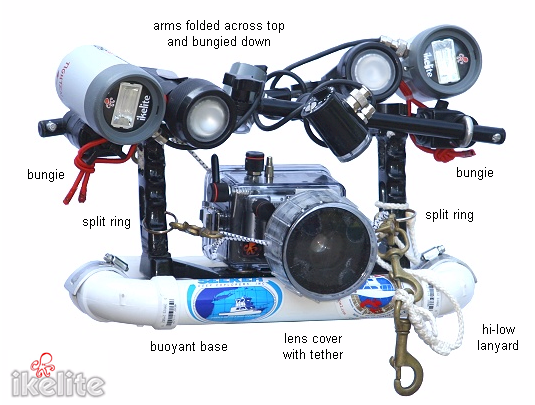
Above is the whole apparatus folded up for traveling, ie: lugging it around in the water. The arms are folded across the top and bungied down to make a compact solid package that is easy to carry and hand up to the boat. The lens is protected by a wetsuit-padded hard plastic cover made from an old light bezel. The split rings allow multiple accessories to be clipped onto the main unit, such as a sunshade for the rear LCD. Diagonally across the back of the housing, just visible is an elastic back strap that holds the back of the housing in place without closing the latches. This makes for easy storage without crushing the o-ring. The whole thing actually fits inside a large plastic toolbox for transport without disassembly.
Altogether, this represents about $2000 worth of equipment, most of which I already had. Many people are amazed to see me take such a setup in the water around here. This complete rig represents quite a bit of thought and development, and with the modifications and additions mentioned here, it is robust and well suited to New Jersey diving.
There was one alternative that I did consider, briefly. That would have been to house my Canon 20D SLR. That would have cost several times as much, depending on just how far I wanted to go with it. And without an expensive new lens, diopters, and a big fragile dome port, the housed SLR would not even be as useful as the little point-and-shoot. In any case, the end result would have been much bigger and bulkier, and more delicate and expensive, such that I probably wouldn't want to take it in the water here, and that would defeat the whole purpose!
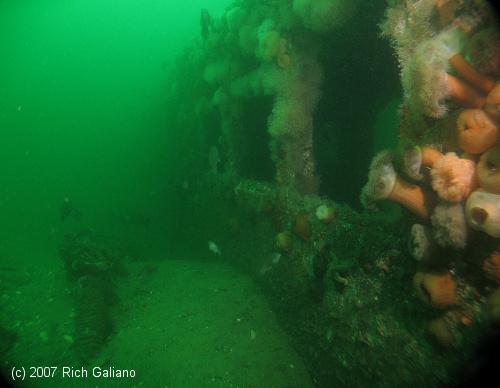
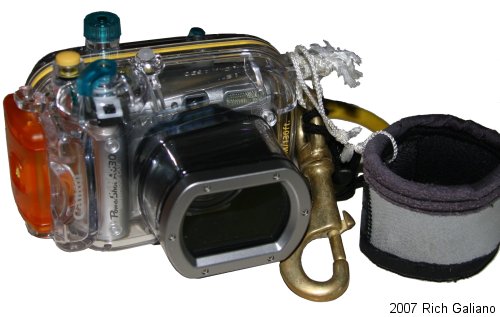
The little Canon housing has proved useful in situations where the huge Ikelite would be difficult or impossible to take along, such as shore diving. In shallow water, no extra lighting is needed. Positively buoyant, it hangs up instead of down when clipped-off. It also has a poorly designed main seal that 'weeps' at depth. I have a similar Olympus that is much better. Note the homemade port cover.
Lighting
Don't be afraid to spend too much on your lighting system, because, unlike the camera/housing combination, your strobe lights will not soon become obsolete. ( The same goes for the wide-angle lens. ) If you invest in the new Ikelite digital strobes and wireless TTL slave sensors, you can transplant them onto any future camera system you get, digital or film, and get many years of use from them. I prefer two small strobes to one big one of equal cost. With two strobes you have many more options: you can widen the area of illumination for larger scenes, overlap them for more intense spotlighting, or shut one or the other off for special effects. The use of dual strobes also avoids the strong dark shadows that are inherent with single strobe use. These underwater slave strobes could also be used topside with a suitable strobe tray for the camera. As I said earlier, your lighting system is at least as important as the camera itself, so if you have extra cash, spend it here.
In conjunction with the accessory aiming lights, strobe aiming is a snap. The co-axial aiming lights throw a bright spot on the subject that is washed out when the strobe fires. These small but powerful halogen lights also light night scenes for the camera's autofocus system, and are bright enough that no other dive light is necessary.
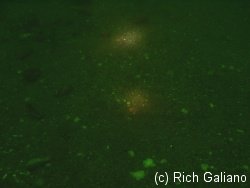
The aiming lights alone, without the strobes. Instead of aiming the strobes side-by-side, here they are aimed near and far, to try to illuminate a longer shot.
One problem that I have noticed when using this lighting system under local conditions is that the TTL exposure setting on the strobes consistently gives under-exposures, and they should be set on manual or "full-blast" for best effect. This is not a defect in the equipment, but rather a defect in the water, which absorbs so much of the light on its way to and from the subject that even the best metering systems are fooled. The camera's exposure system and flash are designed to shoot through nice clear air, while the strobe is calibrated for relatively clear tropical waters, where in fact the TTL setting works just fine.
