Spearfishing - Cleaning Your Catch
Well, that's all just great, but what do I do with it now? Many people have no idea how to clean a fish. Here are some basic instructions:
It is helpful first to understand what you are trying to do when cleaning a fish. The object is to cleanly separate the edible meat from the inedible bones, skin, and guts. Most of the undesirable fishy taste of fish resides in the skin and guts, so it is important to clean fish as soon as possible before that strong fishy taste soaks into the meat. This is especially important with Blackfish, less so for Sea Bass and other types.
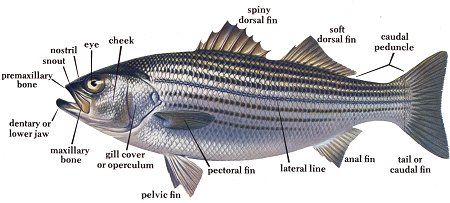
Fish are vertebrates like ourselves, with an internal skeleton, spine, and skull, but that is where the resemblance ends. A fish's skeleton is designed to support the fins and tail and is quite unlike our own. The spine runs nearly down the center of the body, with most of the ribs extending vertically up and down from it. A few lateral ribs support the paired fins in the shoulder area. All the guts are in a sac in the belly.
Filleting is the best way to prepare larger fish for cooking or freezing because it neatly separates the edible parts from the remainder of the fish. The most important thing that you must have to fillet a fish is a fillet knife. A good fillet knife has a long thin flexible blade, and a sharp tip, but most of all, it has a literally razor-sharp edge. You will also want a sharpening stone and some lubricant to keep that edge in top shape. Honing oil is messy and unnecessary - spit works just as well, sometimes I even use fish slime. You can get all of this for not too much at Sports Authority.

A cutting board is also useful. Wood is the best material, as the fish will tend to stick to it rather than slide, as it will on metal or plastic. Wood is also naturally anti-microbial. A piece of plywood scrap works well; you don't have to buy anything. A sharp nail sticking out of the board an inch or two from one end can be used to spike the fish's head or tail for easier handling. A couple of scraps of wood screwed to the bottom of my cleaning board make it fit securely into the top of my cooler, which is very convenient - you work on top, and the fish stay cold inside.
Exercise caution even when handling dead fish - the spines along the back and belly are still needle-sharp, and the gill covers on many species can give you a nasty cut. Also, some fish turn out not to be as dead as you thought.
Step 0
The best way to learn how to fillet fish is to get someone to show you. There are usually lots of old hands hanging around docks and boats who will be happy to show you how if you ask.
Step 1

Give your fillet knife a few swipes along your sharpening stone to hone the edge. A sharp knife is essential - don't be afraid to give it a quick honing even between fishes.
Hold the head of the fish with one hand ( or spike it ) and make a slit from the top to the gut sac, following the line of the meat behind the head and gills. Don't cut into the belly and spill the guts out.
Step 2
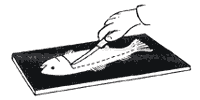
Using the tip of your fillet knife, make a horizontal slit through the skin along the dorsal fin to the tail. Avoid cutting through the bone. See note below for flounders.
Step 3

Work the blade into the fish using progressively deeper slices from head to tail along the bones. If the fish is really fresh, the muscle may still twitch as you cut through it, even though the fish itself is dead. Again, avoid cutting into the belly sac.
Step 4
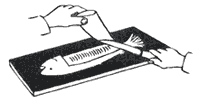
Alternately, insert the knife tip into the long slit near the head and gently slice down the back, keeping the knife flat over the ribs and spine. This method is faster than above but much more wasteful.
Once past the belly area, push the blade tip completely through from top to bottom, and slice back along the spine to the tail fin, peeling the flesh back as you are cutting. Finally, separate the fillet from the rest of the fish.
Step 5
Turn the fish over on the other side and repeat the process. A fillet like this will still contain a few shoulder bones in the head-end, which can be whittled out or ignored. Dispose of the now-empty carcass ( known as a "rack". ) If you're near the water, just throw it in and the crabs and seagulls will take care of it.
Step 6

Remove the skin by laying the fillet flat against the board with the skin side down and trimming the fillet loose. Start at the tail end, with the blade angled down toward the board, using a sawing motion. With a little practice, you can learn to take the skin off with just the thinnest layer of attached meat wasted.
Alternately, you may scale the fish before filleting, and leave the skin on. Don't scale a fish with your fillet knife - you'll ruin the edge. Use something else, like a spoon. Blackfish have such tough hides that you can actually grab the skin with pliers and rip it off the meat. This is more difficult with other, thinner-skinned types. Incredibly, seagulls will catch and eat this stuff if you throw it up to them.
Step 7
Your fillets are now ready for cooking or freezing to be enjoyed at a future date. Rinse off any blood, but try to minimize exposure of fish fillets to freshwater, as they will soak it up like a sponge. This does not affect the taste, but it will affect the texture and consistency of the meat. Store fish in a Ziploc bag with all the air squeezed out. They can be frozen like this also.
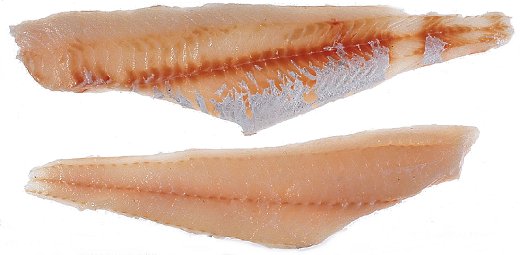
Be sure to wash your knife with fresh water and wipe it dry before inserting it back into the sheath. To remove the fishy odor from your fingers wash with a little lemon juice. Rinse off the cutting board, and leave it out in the sun for a few days along with your bag to get rid of the smell. Don't leave a wooden board on the ground for too long - the termites will have a party ( personal experience. )
Non-Standard Fishes
Flounders are filleted slightly differently than above: Starting on the top side, make a long cut down the center of the fish from head to tail, directly over the spine. Then work outwards to each edge, making two smaller fillets. Discard the thin "fin meat" along the outer edges. For a large flounder, turn it over and repeat, for a total of four fillets. The fillets from the bottom are much thinner and didn't used to be worth the trouble on small fish, but nowadays you can't take small fish anyway. Flounder are the easiest fish of all to clean, and the fillets are completely boneless.
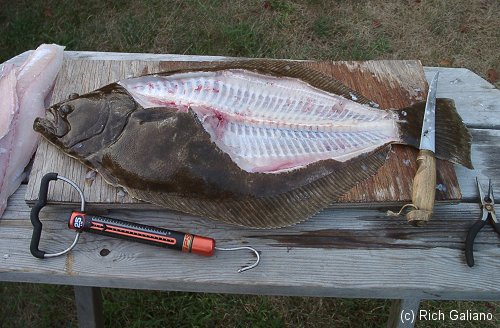
Cleaning a Goosefish is different from any other kind of fish. Lay it on its belly on the cutting board, and make a sideways cut in behind the skull to the spine, with the knife more or less vertical, then cut back along the spine to the tail. Repeat for the other side. Be sure to clean the fillets thoroughly, removing all traces of skin, body cavity lining, and slime. Two more small plugs of excellent scallop-like meat may be cut from the cheeks. Wash everything completely when you are done, as the slime is copious and pervasive, although not too smelly.
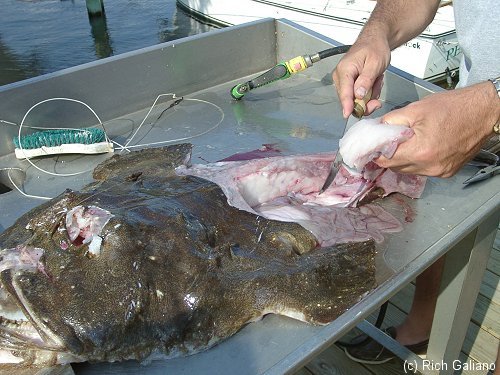
The best way to handle a Goosefish without messing up the boat is to hang it over the side in the water until there is a lull in activity. Then pull it up onto the swim step or gunnel, and quickly clean it there, without actually bringing it into the boat. Throw the meat on ice, kick the carcass overboard, and scrub the slime away immediately before it dries.
Goosefish requires special considerations for cooking. If prepared like typical fish, for example, breaded and pan-fried, the result is inedible ( in my opinion. ) Instead, Goosefish should be prepared more like lobster - baked, stuffed, or stewed. There are many excellent Goosefish recipes that can be found with a quick internet search. ( Remember that in culinary circles, Goosefish is almost always referred to as Monkfish. )
Yields
Blackfish and Sea Bass yield about 30% fillets by weight. Ling and flounder are somewhat higher, around 50%; Porgy is lower - around 25%. Goosefish is quite low - less than 20%, but that is made up for by the size.
Remember - it is not legal to clean any regulated fish or lobster at sea - you must bring it back to the dock intact. Note that this does not include Goosefish, which is not regulated.
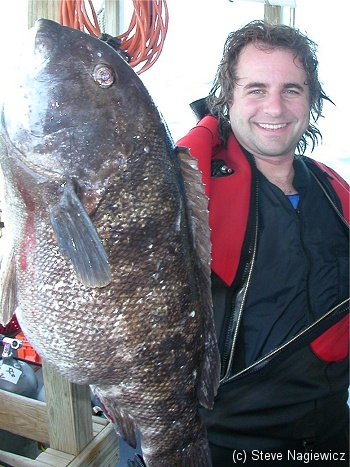
Hold the fish really close to the camera.

